
Keygenning diablo2oo2's crackme 6
Overview
The following tutorial will document how to unpack and program a keygenerator for diablo2oo2’s sixth crackme.
The crackme can be found here.
Scanning the crackme.
It is useful to scan the crackme for any protection or any possible hints as to the cryptography used in the serial method in the crackme.
There is several ways to do this:
- using Protection ID to scan for protection.
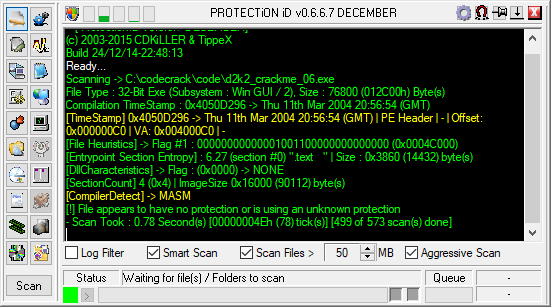
No protection or packing method is found.
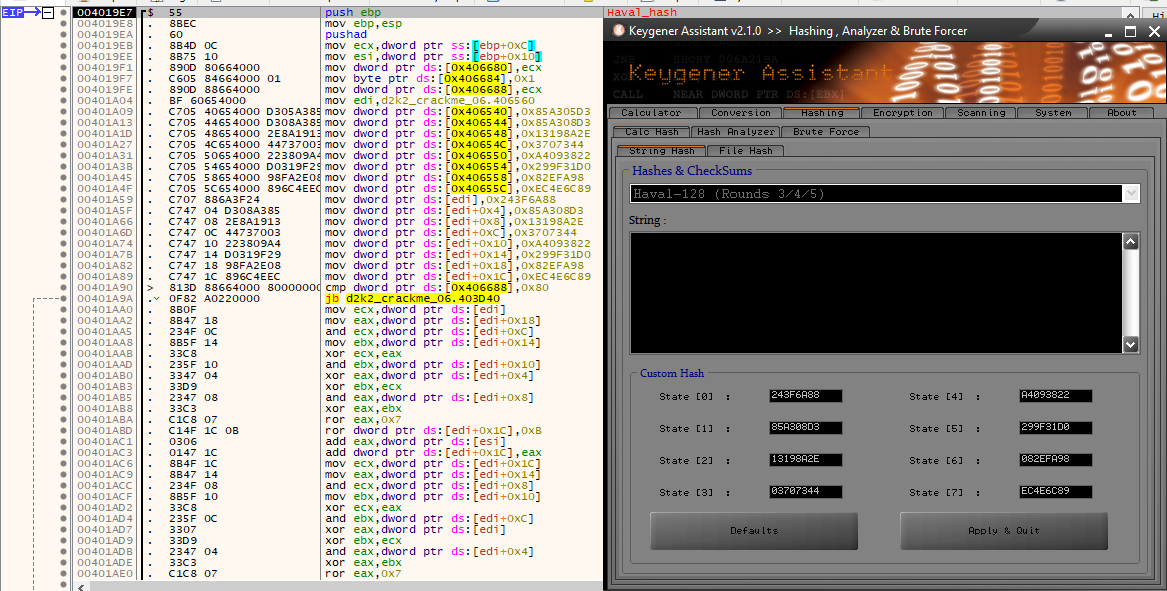
- Using “Keygener Assistant” to scan for any encryption/hashing constants.

There is 2 methods found: references to CRC32 constants as well as a possible usage of HAVAL.
- Using signatures defined by YARA and using an GUI for processing them.
Reverse engineering the crackme.
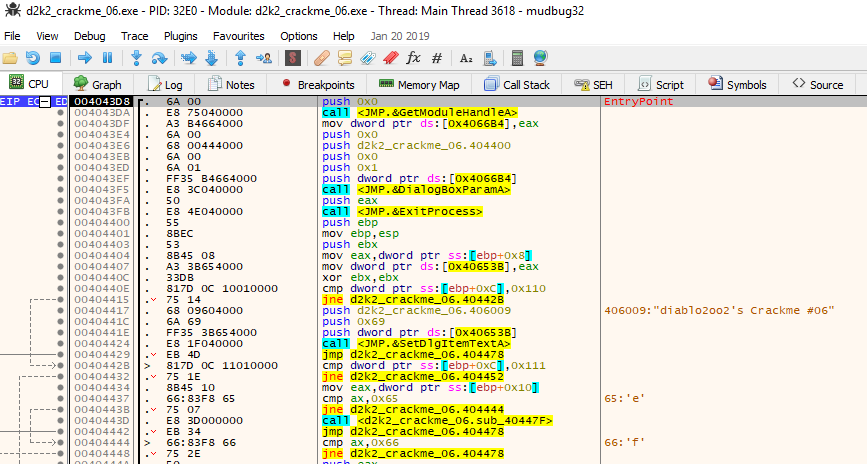
Load up the executable in x32dbg. The debugger should load the executable at the following code:
Run the crackme in x32dbg.
From here, it is needed to place any possible breakpoints on places which the user enters any data, say for instance username and serial key.

Stepping through our entered serial number and username, it becomes immediately apparent that the length of the serial key is checked and tested against the length entered. In this case our entered serial, which is 10 characters (0xA in hex) characters in length does not match the limit,which is 0x10 characters. In this case the check will fail and jump over a vast length of code to drop at the following….

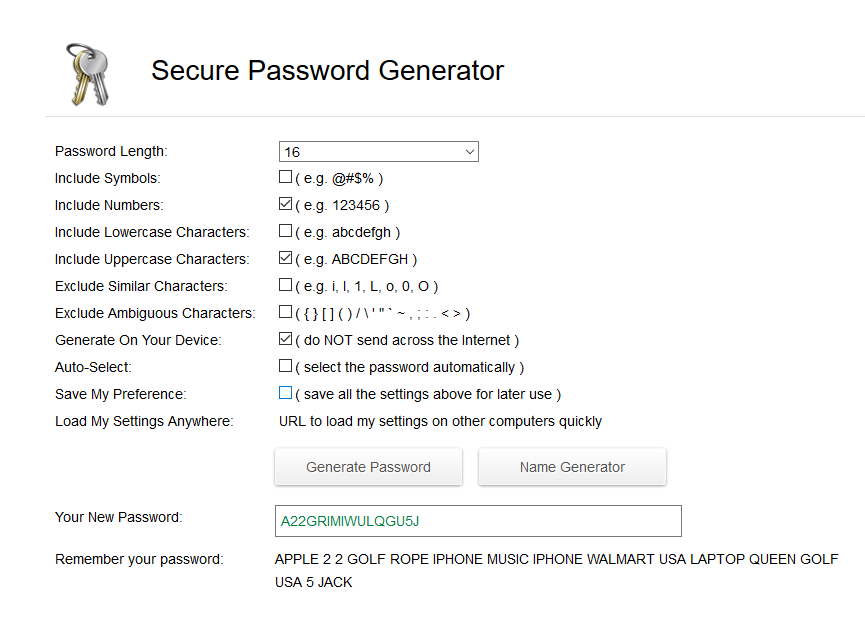
Which is precisely where we don’t want to be. We want to pass the check, so our serial key must be exactly 0x10 (in hex) characters in length
To make a random string long enough to be exactly 0x10 (16) characters in length I used Secure Password Generator.
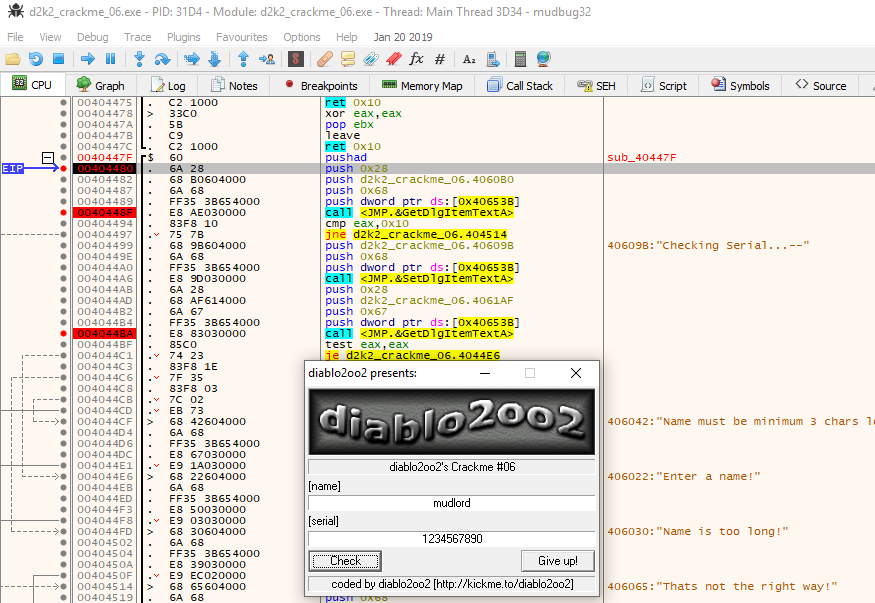
So we rerun the check in the debugger, only this time trying a serial key which is precisely 16 characters (0x10 in hex) in length (which is the one we generated on the password site). Doing so gets us to the following:
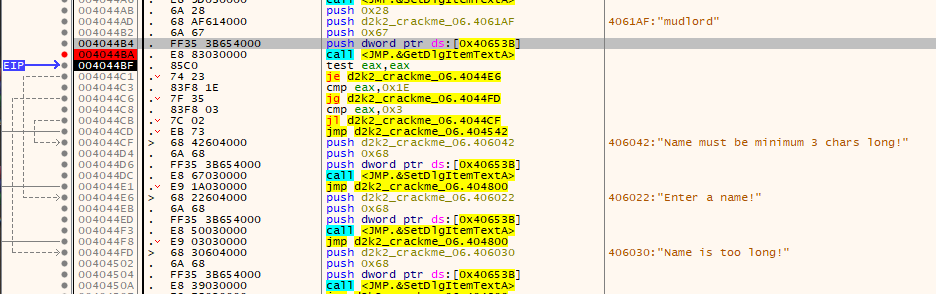
This check checks the username for the length of characters. It must be greater than 3 characters in length and less than 30 characters (0x1E in hex).
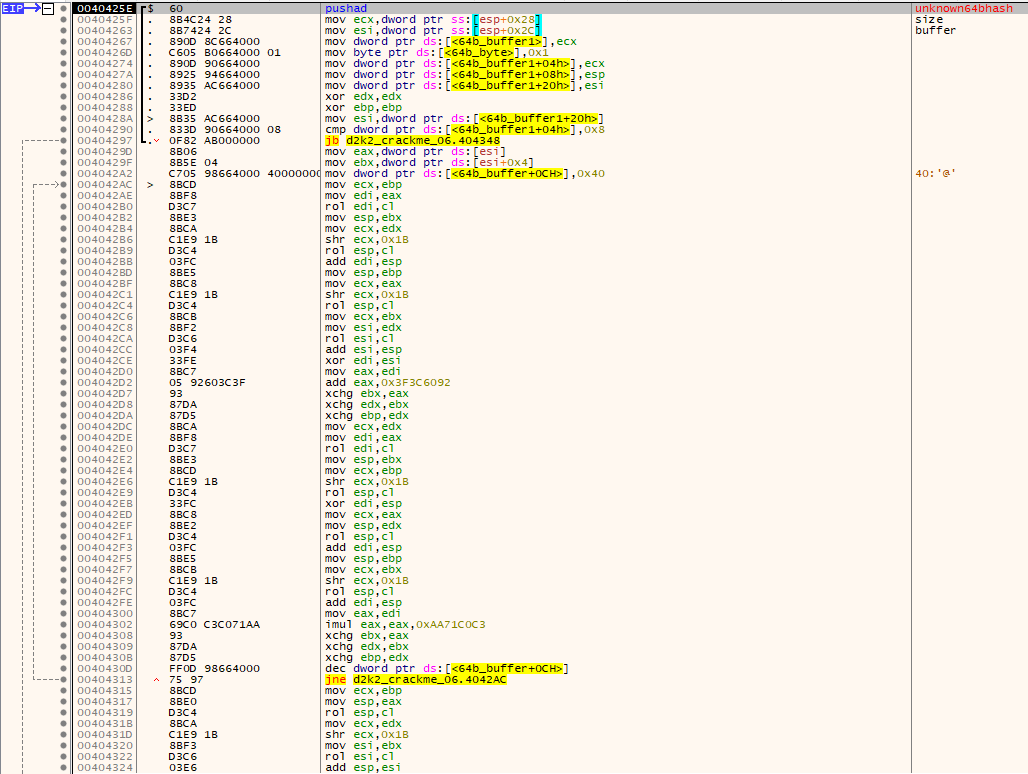
From here if the name passes those checks it moves to the first portion of the serial algorithm which is used as input for the rest of the checks:
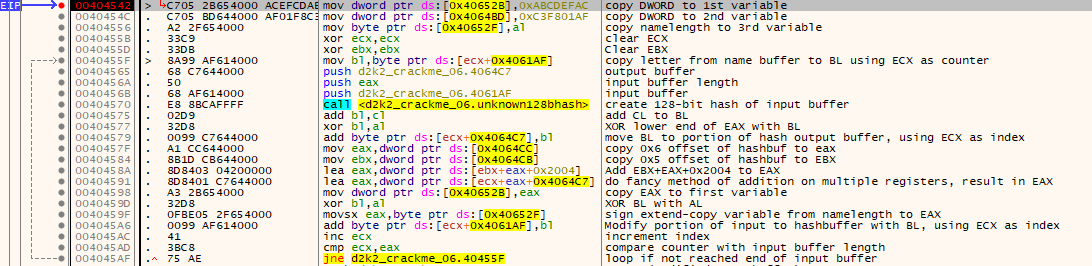
- The algorithm first copies some DWORDs to a global variable, and initial registers are cleared.
- The contents of a buffer (which is initialized with the username) is hashed using a custom 128bit hash method. A global variable which is initialized earlier is used in this subroutine.
- The output of the hash algorithm is modified per byte with simple XOR and addition operations, using also the output of the hash algorithm.
- The DWORD used as a seed for the hash algorithm is also modified using results from these operations.
- The input buffer is also modified with these operations, as shown in the above annotated screenshot.
- The loop continues until all the components of the input buffer are modified, one by one.
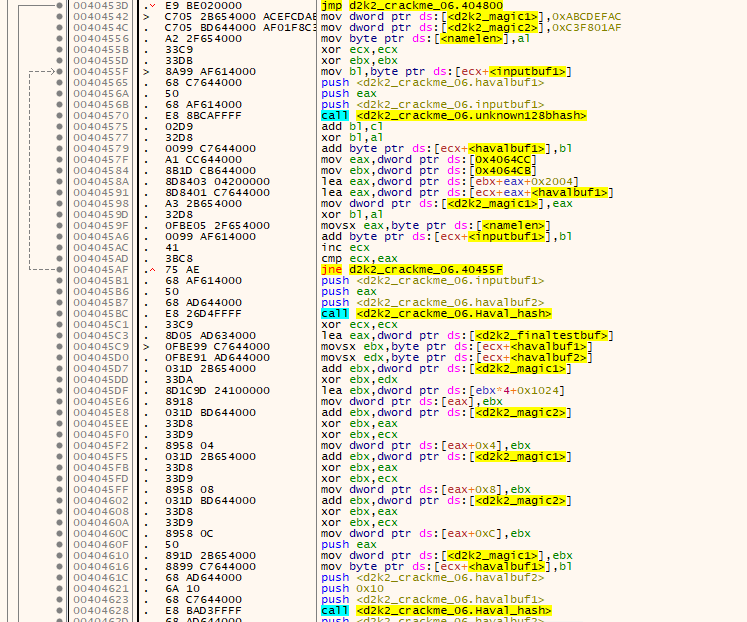
Then, the next portion of the serial algorithm is executed:

The modified input buffer is then hashed using the Haval hash algorithm, this is shown by the Haval init constants being in use.
The output of this Haval hashing is used as input for the next and final serial hashing loop.
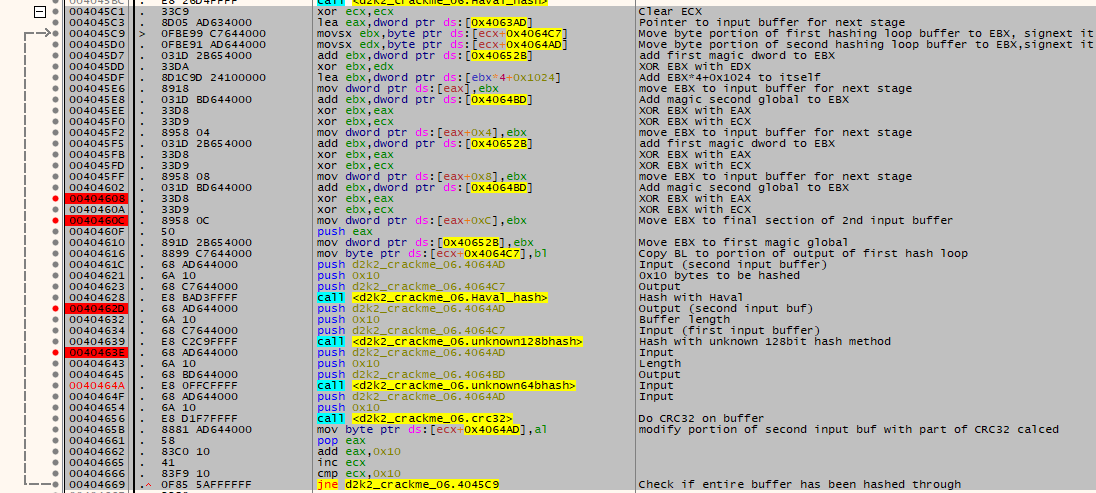
- Input from the Haval and custom 128bit hash is used with simple arithmetic to build a table, which is built DWORD by DWORD. The custom 128bit hash output is further modified per byte using data from this stage. Haval output is also modified per byte
- The customized Haval hash output is then hashed yet again with Haval into a new buffer.
- This new buffer is then hashed with the custom 128bit hash.
- The results from step 3 are then hashed using a custom 64bit hash.
- This loop continues until 0x10 characters are processed.
Results from this algorithm are used to build up a 64bit hash. This 64bit hash has the lower DWORD used as a magic value which is used in step 1.
The table built in the previous steps is used for the serial checking code:
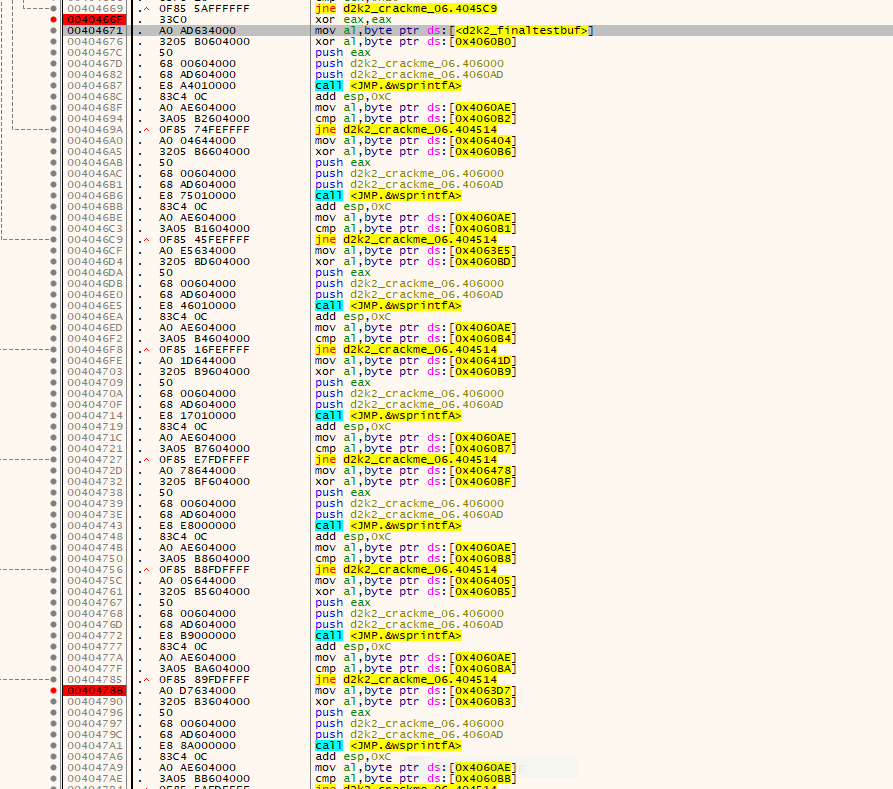
The serial checking code is rather simple. A set of rules is used to do the final check. For each check a byte from the test table built in the previous loop is XORed against a value from the entered serial. This altered byte is then checked against another character in the entered serial. If all checks pass, the serial is considered valid.
Writing the keygen.
Writing the keygen took considerable time for verifying results against the original crackme, as well as splicing code fragments from the original crackme. This is needed due to the vast amount of code (over 4000 lines of x86 assembly!!!).
Writing the keygen was a process of:
- For each relevant code fragment in the crackme executable, rewrite in C. To assist this process, relabel each value in x64dbg’s disassembly to easily recognizable values.
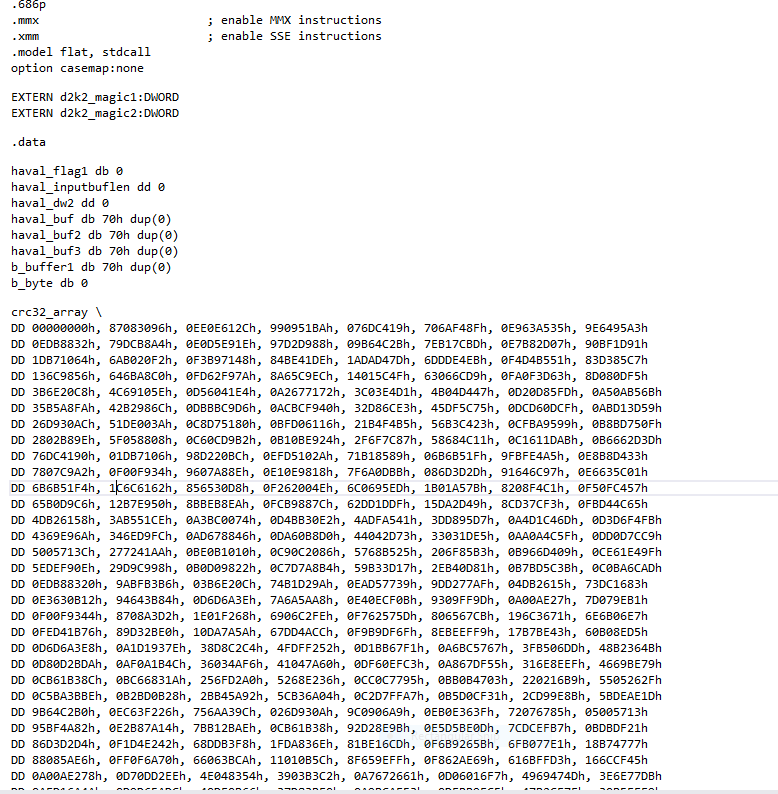
- For custom functions such as the modified Haval and custom hashes, use a x64dbg plugin to splice the code fragments to a seperate MASM source file in MSVC.
- For addresses and offsets in the MASM source file, convert to relevant variables.
- Verify each code segment against the original crackme.
An example of step 1 is the following:
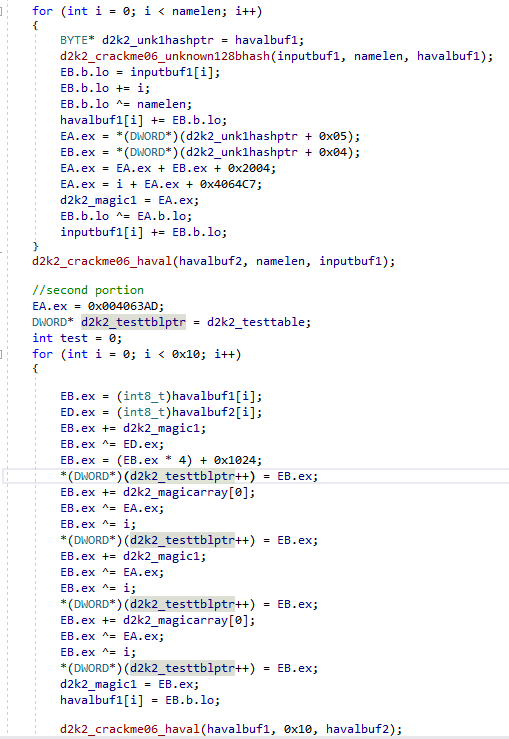
The use of the following union is used to assist in writing the code:
typedef union
{
	uint64_t rx;
	uint32_t ex;
	uint16_t x;
	struct { uint8_t lo, hi; }b;
} Register;
This is used to abstract each x86 register behaviour and to allow for easy porting of the crackme code to C. Each mathematical operation used in the original assembly code is written into C equivalents.
Step 2 is done using fearless’ CopytoAsm plugin for x64dbg.
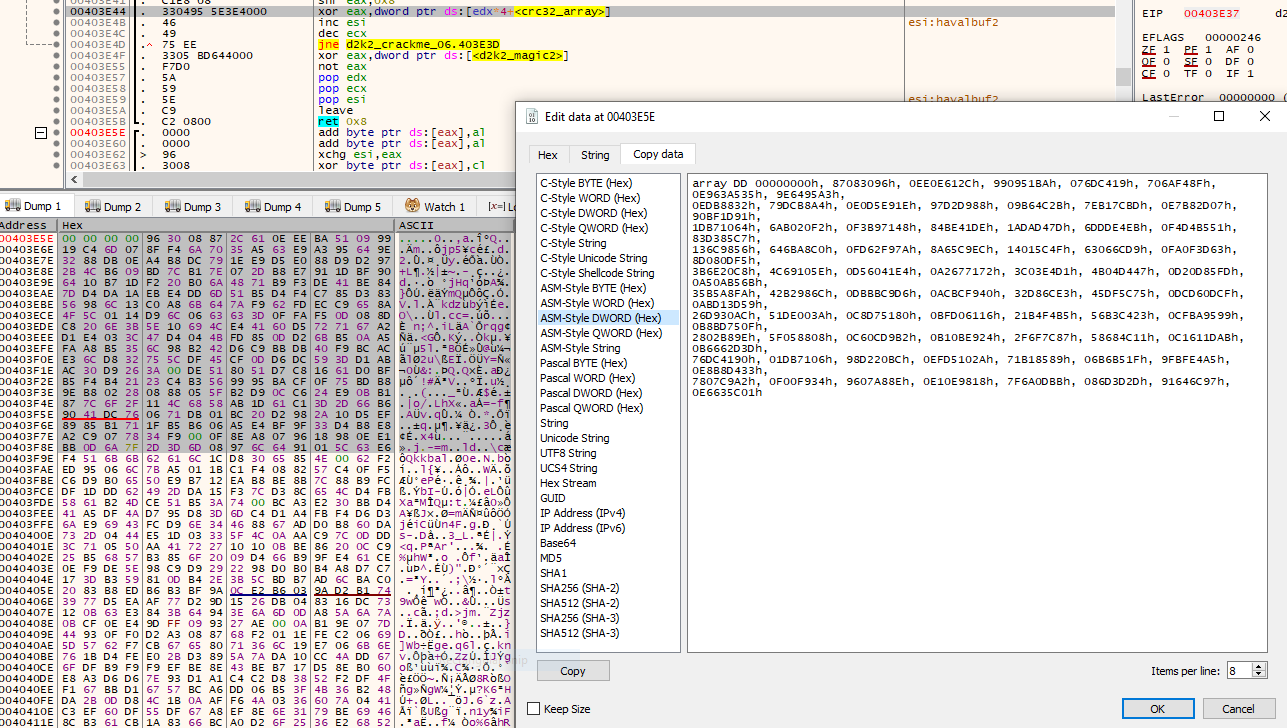
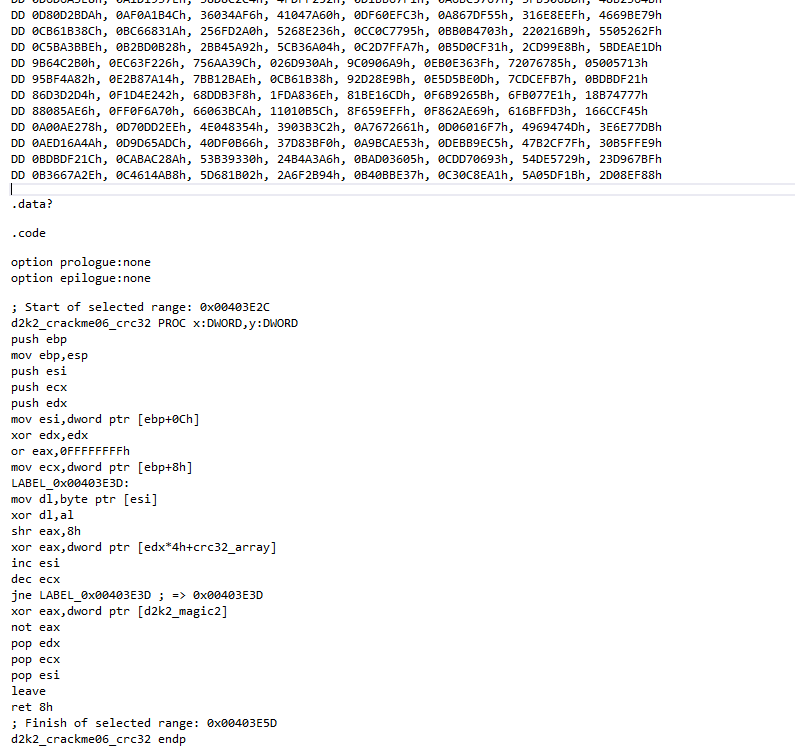
The CRC32 table was copied from the “Dump” window using x64dbg’s built in data copy formatting options. The length of the data to be copied was determined using simple arithmetic (each CRC32 table has 256 DWORDs, hence 0x400 bytes);
 By clicking “CopytoAsm x86 > Selected range to clipboard”, the selected code fragment is copied to the clipboard.
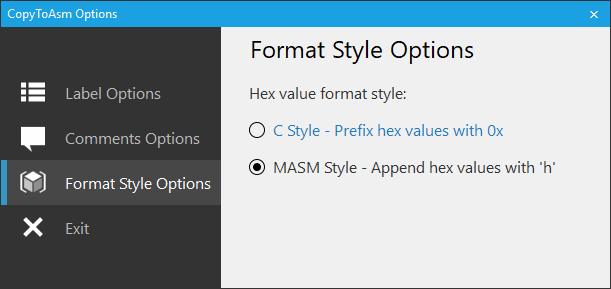
You may have to change the number prefix values to format hex values into MASM format.
Step 3 is performed by further debugging each code fragment and watching carefully in x64dbg’s “Dump” window and register view any possible changes to any register/dump value. This was used to determine possible behaviour. This was especially helpful when finding buffer offsets in the Haval hash function as well as other things in the crackme like the final serial check.
Step 4 was just a continual process of comparing results in MSVC’s debugger vs the debugged output in the crackme.
Keygen source code.
Source code to the keygen is here.
The accompanying x86 assembly for the keygen is here.
MSVC2017 is used to compile. It should compile out of the box. Feel free to use the template for your own crackme keygens.